Ahhhhh, I'm coming down from my Easter high!
As with Christmas and birthday parties, I feel a little sad that all of my hard work is about to be boxed up and stowed away and probably forgotten (until next year anyway). My supply of Easter decor was acceptable before and worked well enough, but this year I worked for weeks to create a fun, whimsical and pretty presentation around the house. I made countless trips to Michael's, Wal-Mart and Target and spent a lot of time on DIY projects, not to mention all of the time that I spent sitting in front of the computer perusing various websites for inspiration. I had so many ideas that I couldn't even get to them all, and now I won't have the chance to because it's all over!
I'll be honest, so far the only things that have been put away are the egg shaped placemats from our kitchen table and a vase that was holding some foil wrapped chocolate eggs, so the Easter tear down process is moving in slow motion. That's mostly because I've been procrastinating, but also because I haven't had the time to dedicate to the clean up. If I'm going to put it away I want it all to go at the same time! Get it over and done with. So I guess we all know how I'll be spending my weekend.
The good news is that there aren't any holidays coming up that require much attention to decorating so I can take a little break. Little being the key word there. I have a birthday party to plan in June for a special 3 year old and then we're on to 4th of July...
And my wheels are spinning again!
Friday, April 29, 2011
Wednesday, April 27, 2011
Belly Aches and Cavities
Holy sugar! I was an Easter treat making FOOL last week! M&M pretzel snacks, rice krispie treat Peep pops, and 3 varieties of cupcakes. And there were even more yummy treats on my Sweets Wish List that I didn't get to. That's probably a good thing for my belly and my teeth though!
My girls were on Spring Break last week so it was fun for them to get involved and help me in the kitchen. They were super excited to share some of our homemade treats with their friends at a playdate too. We had to get rid of some of our goodies because there is no way that we could have (or should have) eaten them all!
First up were the M&M pretzel snacks - sooooooo easy and yummy! The perfect combination of sweet and salty and so cute too. Beware: these are addictive! I gave this recipe to lots of people and they all said so! We used an entire 1 pound bag of pretzels and they were gone way too fast.

Next were the rice krispie treat Peep pops. The kids loved helping with this one! I saw this fun kid-friendly treat on Love from the Oven and knew that we had to make them because Peeps are one of my all time favorite candies! I was smitten with Love from the Oven from the start because they dedicated an entire week to Peeps recipes. Why didn't I think of that? Next year for sure!

And finally - cupcakes! We made 2 dozen of the Pillsbury funfetti cupcakes and I offered the kids 3 different decorating options - bunnies, Easter baskets or Peeps. The bunnies were an idea that I saw in a magazine (I can't recall which one now b/c I saw so many cute ideas) and on Facebook, the baskets were an updated version of of the ones my Grandma used to make, and the Peeps were from (where else?) Love from the Oven's Peeps Week.


My girls were on Spring Break last week so it was fun for them to get involved and help me in the kitchen. They were super excited to share some of our homemade treats with their friends at a playdate too. We had to get rid of some of our goodies because there is no way that we could have (or should have) eaten them all!
First up were the M&M pretzel snacks - sooooooo easy and yummy! The perfect combination of sweet and salty and so cute too. Beware: these are addictive! I gave this recipe to lots of people and they all said so! We used an entire 1 pound bag of pretzels and they were gone way too fast.
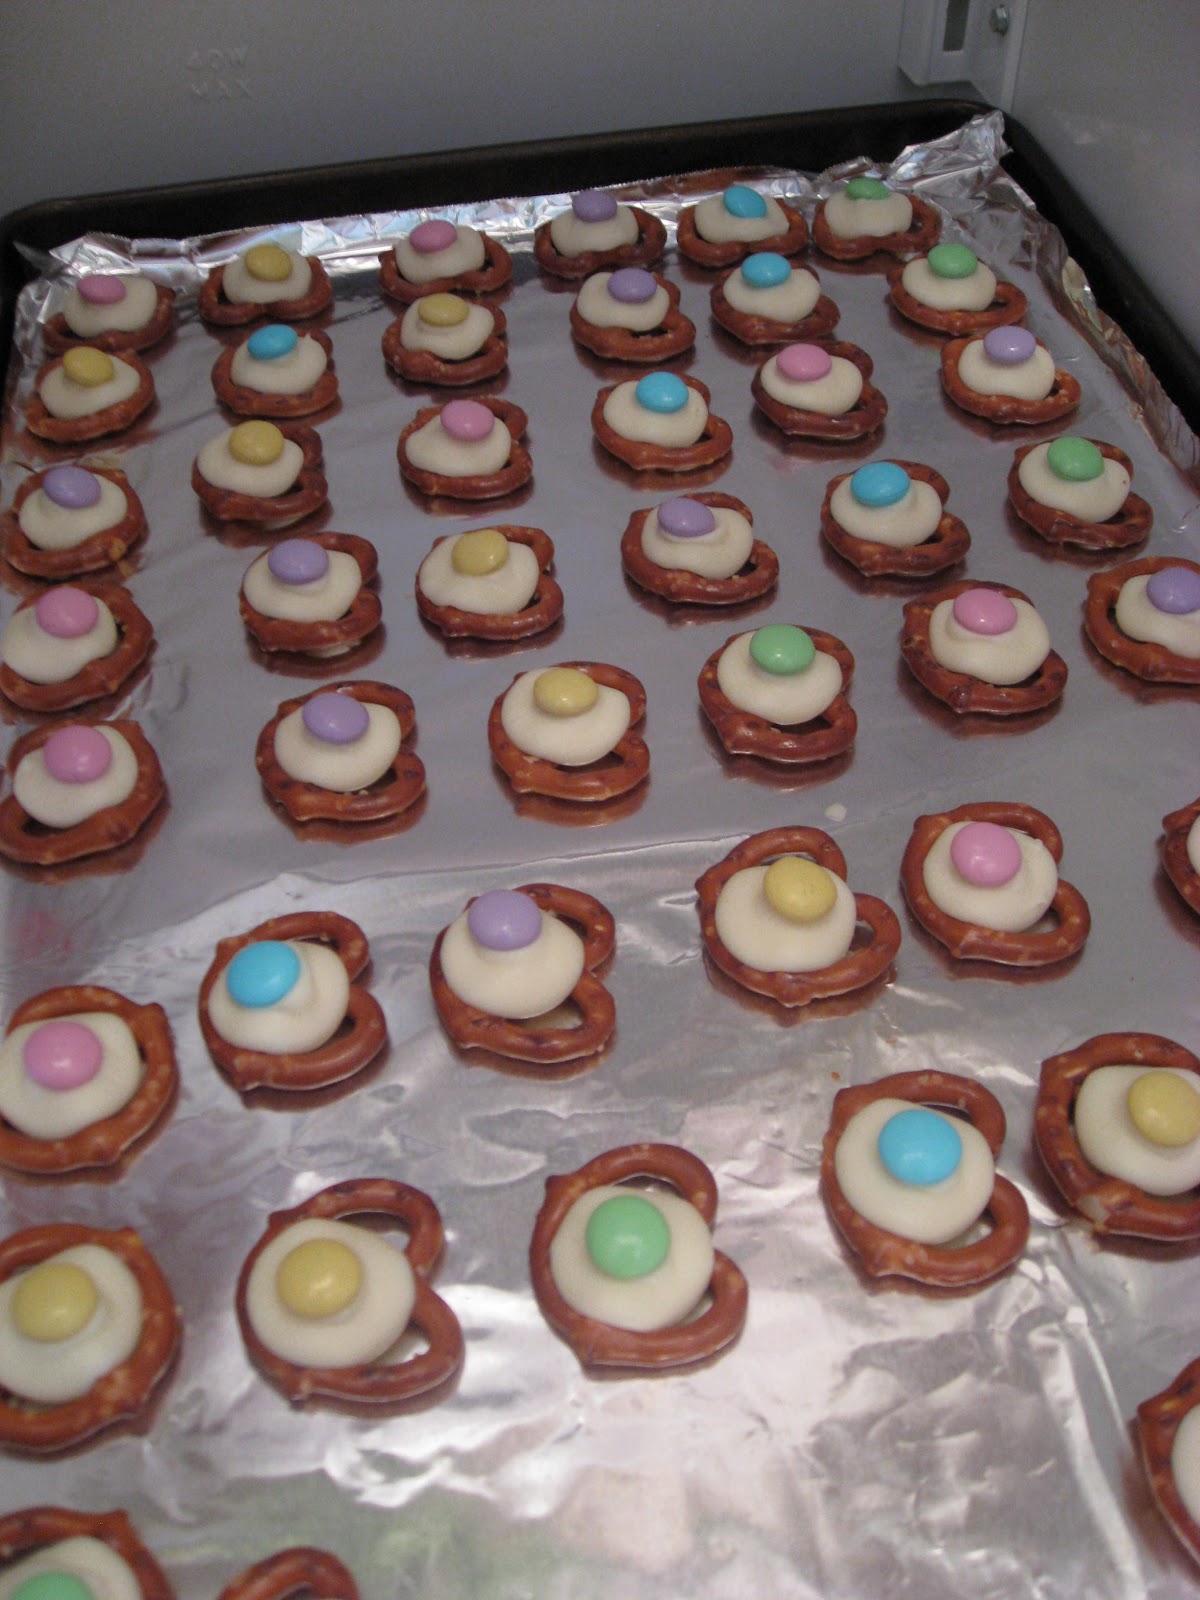
These are beyond easy to make:
Pre-heat oven to 350, then line a baking sheet with pretzels and top each one with a candy melt. I used Wilton white melts but there are several flavors and colors to choose from. Place baking sheet in the oven for 2-3 min. to allow melts to soften. Remove from oven and immediately press an M&M gently on top of each pretzel. Refrigerate for 10-15 min. to allow candy to set. Now enjoy! These are also great b/c they can be varied in so many ways. For Christmas I'm planning to use Hershey's kisses in the center with green and red M&M's!
Next were the rice krispie treat Peep pops. The kids loved helping with this one! I saw this fun kid-friendly treat on Love from the Oven and knew that we had to make them because Peeps are one of my all time favorite candies! I was smitten with Love from the Oven from the start because they dedicated an entire week to Peeps recipes. Why didn't I think of that? Next year for sure!

This is not the best photo but the rest were uploading sideways for some reason.
We used the already-made version of rice krispie treats because I cannot for the life of me make homemade ones. Spread a little frosting on top of each rice krispie treat, top with a Peep and add sprinkles. Insert a lollipop stick and you're done. Kids love things that come on a stick! We wrapped ours in plastic to help keep them fresh and make them look cute cuter when we gave them to friends.
And finally - cupcakes! We made 2 dozen of the Pillsbury funfetti cupcakes and I offered the kids 3 different decorating options - bunnies, Easter baskets or Peeps. The bunnies were an idea that I saw in a magazine (I can't recall which one now b/c I saw so many cute ideas) and on Facebook, the baskets were an updated version of of the ones my Grandma used to make, and the Peeps were from (where else?) Love from the Oven's Peeps Week.

These were easy too!
Bake your favorite brand/flavor cupcakes and allow to cool completely. Add white frosting and use jelly beans (or other candies of that size) for the eyes and nose. Use black tube frosting to draw whiskers. For the ears cut a marshmallow in half (I actually found a really cool new variety called Stackers that were square and flat so they were easier to work with than the super puffy ones). Dip the sticky side of the marshmallow in pink sugar or sprinkles and stick them on to the top of the cupcake.

These remind me of my Grandma b/c she used to make something very similar but without the licorice handles. Start with your favorite cupcakes again and add white frosting. Place shredded coconut in a plastic bag with a few drops of green food coloring and shake until coconut is covered with food coloring. Place a small amount on top of each cupcake followed by a few jelly beans in the center. For the licorice handle (I found rainbow colored Twizzlers and choose to use yellow but any color will do) cut the licorice in half and place a toothpick in each end, then gently press the toothpicks into opposite sides of the cupcake. Just don't forget to remove the toothpicks before eating! Last year I made these without the coconut "grass" but I colored the frosting green to give a similar affect.

And last but not least, the Peeps version and probably the easiest one!
Bake any variety of cupcakes and top with any color/flavor frosting, then decorate with sprinkles and top with a Peep. I actually stuck a toothpick in the bottom of each Peep and then pushed the toothpick into the cupcake to help them stand better but that is optional b/c the frosting will harden a bit and work as glue to hold the Peep in place.
So in addition to all of the candy that the Easter Bunny was kind enough to bring for the kids we had all of these goodies just hanging out in our kitchen and I think it's safe to say that we were all on sugar overload!
Sunday, April 17, 2011
Easter Table Scape (last of the madness)!
And so the Easter decorating madness continues with my dining room table scape. This might be my favorite piece of crafting and decorating that I have done for this holiday. I adore my door wreath but the table scape was so much fun! Pinwheels, bunnies and grass, oh my! Too bad we never use that table, or even the room for that matter. Oh well, I enjoy just walking past it!
I saw this super cute bunny garland on one of my fave blogs, Hostess with the Mostess, and just had to do it. I made 2 separate garlands and used them as runners on each side of the dining room table. It was soooooo easy and the girls were even able to help out a little with this project.
I saw this super cute bunny garland on one of my fave blogs, Hostess with the Mostess, and just had to do it. I made 2 separate garlands and used them as runners on each side of the dining room table. It was soooooo easy and the girls were even able to help out a little with this project.
 |
| Bunnies made from scrapbook paper. |
 |
| Bunny garland. I love this garland idea b/c you can do so many different things with it! Here's how to make the bunny garland, but you can also do other fun Easter shapes, like eggs. -You will need several pieces of assorted scrapbook paper, some ribbon, and a bunny template. I found several using Google and choose the one that I liked best. -Trace several bunnies onto your scrapbook paper and cut them out. - Using an exacto knife make 2 slits on each bunny and thread your ribbon through. - Now just find the perfect place for your garland! The centerpieces were my own little creation and I had so much fun making them. The best part? They were very inexpensive! I found a DIY tutorial on how to make pinwheels and was pleasantly surprised at how simple it was. The little galvanized containers came from Target's Dollar Spot and I put blocks of styrofoam in the bottoms, then added some jelly beans to cover the styrofoam. The grass runner is actually made up of 5 artificial grass mats that I found at Shindigz. I searched high and low for these things when I was planning R's b-day party and could not find any that were reasonably priced, but I decided to look again for my Easter/Spring decorating and voila! I found them! Persistence pays off. The little pink flowers were leftover from R's b-day party and I thought they added a nice touch. |
 |
| Pinwheel centerpiece on grass mat runner. |
This centerpiece was so easy and inexpensive:
Grass mats - $2.49 each from Shindigz
Galvanized containers - $1 each at Target
Styrofoam blocks - $2/pack of 2 at Wal-Mart (I cut the blocks down to fit all 3 containers).
Jelly beans - $1/bag from Dollar Store
Wooden dowels for pinwheels - $2.49/pack of 10 at Michael's
Scrapbook paper - $0.99/sheet at Michael's (I did 2 pinwheels per sheet).
And here is the finished product!
 |
| Easter/Spring table scape Now that all of the decorating and crafting is done it's time to bake! I'll be spending this Spring Break week in the kitchen making sweets so stay tuned for photos and recipes! |
Friday, April 15, 2011
April Designer Spotlight
Wow! I got so carried away with the Easter madness that I almost forgot about doing a designer spotlight blog post this month. Ooops! That's what happens when I start crafting, decorating and prepping for a holiday.
This month's designer is Twirls and Twigs. The owner/creator/designer of Twirls and Twigs is Shawna Dalton and her clothes are amazing for many reasons -
As described on their website - "Shawna turns sustainable fibers, designer leftovers and recycled cotton into trimmed and bountiful whimsy that reconciles style with substance." I couldn't have said it better:) And who doesn't love adorable, unique clothing that's green too?
I bought our first pieces from this designer a few years ago from an online boutique but then discovered shortly thereafter that Nordstrom's was also carrying the brand. I still purchase mostly through online retailers because the selection is much greater and I can usually find the sizes that I need easily. Due to the fact that most of the materials are left-overs or recycled fabrics there are often limited quantities of each piece, which makes them all the more unique. I have also discovered that the same style of a specific piece may have slight and barely noticeable variations, like different buttons or a different color trim, but I actually like that about this brand. I love the uniqueness of each piece and the fact that someone can take scraps of leftover materials and make such a beautiful piece of clothing. I wish that I were that handy and creative! Being able to sew would probably be helpful too. Maybe someday...
 |
| Can you believe that these pretties were made from scraps and recycled fabrics? |
Friday, April 8, 2011
Miscellaneous (Easter) Madness
Is anyone tired of my Easter posts yet? I've had so much fun decorating and crafting for this holiday! And I'm not done yet! It's not just Easter, it's Spring time, and I have always loved spring so maybe that's why it's been so much fun for me. Spring is such a happy and lively time with the sun shining, flowers blooming, birds singing, and kids playing outside. Everything is awake and alive and rejuvenated after the winter. I am not winter's biggest fan so I welcome spring with open arms!
The following are just some random Easter/Spring decorations throughout our house that I wanted to share. Enjoy!
I googled DIY Easter crafts and this wreath was one of the first things that caught my eye. I love that it's not a traditional wreath and it was relatively easy and inexpensive to make.

These decorative jars filled with Peeps also caught my eye b/c Peeps are not only my favorite Easter candy but one of my all time favorite candies period! This idea is so simple and cute!


The following are just some random Easter/Spring decorations throughout our house that I wanted to share. Enjoy!
I googled DIY Easter crafts and this wreath was one of the first things that caught my eye. I love that it's not a traditional wreath and it was relatively easy and inexpensive to make.

Here's how I did it:
*White frame - $4.99 at Michael's
*Grass mat - $2.49 from Shindigz
*Decorative eggs - taken from an old wreath that I no longer use
*Ribbon - $2.99 at Michael's
Cut the center out of the grass mat. Use glue gun to attach eggs to grass mat. Remove glass from frame and place grass mat inside. Tie ribbon around frame and mat and hang on wreath hanger.
These decorative jars filled with Peeps also caught my eye b/c Peeps are not only my favorite Easter candy but one of my all time favorite candies period! This idea is so simple and cute!

*Jars $2.99 and $3.99 at Ikea
*Peeps $0.98/pack at Wal-Mart
*Jelly beans $2/pack at Wal-Mart
*Ribbon $1.99/roll at Michael's
Arrange Peeps in jars facing outward. Fill center of jars with jelly beans to hold Peeps in place. Tie ribbon around lids.

And this little Easter "basket" from Target acts as a book tote for all of our Easter reading. Only $5 and very sturdy! The perfect size for holding books and for the kids to carry.
I promise that I'm almost done with the Easter madness. I still have the dining room table scape to share and then probably some baking fun but that should just about do it!
Wednesday, April 6, 2011
Easter Mantel (more madness)
My parents are arriving for a visit tomorrow and I started to panic because I realized that I haven't completed a lot of my Easter decor projects. Do my parents really care? Of course not. But I do!
So while the kids napped today I spent almost 2 full hours making a game plan and executing it. As I mentioned before I am overwhelmed with ideas, and narrowing it down to just a few has been tough. I've made several trips to Michael's and Target and finally decided that if I don't have everything that I "need" by now then some of the projects just are not going to happen this year. I need to go with what I do have and get it done so that we can all actually enjoy my efforts. And so today was quite productive.
I finished the fireplace mantel and made a wreath for our front door, plus I started on the dining room table scape. I started on the mantel over a week ago but I kept adding things, moving this and that, taking things away, etc. Finally today it is done and I am happy with it. For now.
- Of course the much talked about mini egg trees from Target were the first things to go up. Only $2.50 each and super cute! The little ornaments were also $2.50 and there were enough in 1 pack to use on both trees, so the grand total of that mini project was $7.50. Not too bad. And the cute little bunnies that I placed beside each tree are also from Target and came in several different fun, springy prints and patterns.
- Next up on the mantle is my fabric "Happy Easter" banner. That one is an oldie but goodie. It came from Home Goods several years ago and if I remember correctly it cost less than $10.
- Then there are those cute little bunny and chick paper lanterns. Only $1.99 each at Michael's but very labor intensive. It took me over an hour to put those things together. An hour and a lot of glue. There is a reason why they were only $1.99. I doubt if they will be around next year. But they are cute for now!
- And hanging in mid-air with the paper lanterns are my egg tree ornaments from a few years ago. Since I used the sequined ones on my tree (the bigger egg tree that is displayed on our kitchen island) this year I didn't need these, so I found another fun use for them.
 |
| How cute is the bunny with the mini egg tree? |
 |
| I love using fishing wire to create the illusion that things are hanging in mid-air. |
 |
| And there you have it - The Easter Mantel! |
Saturday, April 2, 2011
Easter Madness
So my head is still spinning with fun, creative ideas for Easter and Spring decor, crafts, food, etc. I don't know to make it stop. Sometimes I wish I could turn off the part of my brain that makes me want to be so crafty. Really I do. I am so overwhelmed with ideas. There is no way that I could possibly execute them all, nor should I, because doing so would cause my home to look like some sort of Easter tornado tore through it scattering egg, bunny, flower and chickee debris everywhere.
This whole decorating process is going to end up taking up as much of my time and space in my home as Christmas decorating does and that's just not right. Christmas is the ultimate holiday for decorating, baking, and crafting so Easter should not take over! This means that when Christmas rolls around this year I'm going to have to step it up a bit in order to out do Easter (and myself).
What have I gotten myself into?
Since I have so many great ideas to share I decided that I will need to write multiple blog posts rather than one GIANT one. This will be the first installment with more to follow as I complete the projects.
First up - my DIY Egg Tree. This not the same as the mini egg trees from Target that I mentioned in my very first blog post. This is actually a DIY project that I originally created about 3 years ago but updated this year by adding some ribbon trim to my tree pot. I "borrowed" the idea from Pottery Barn Kids - at the time their Egg Tree was around $69 but this year their version is $49 (that does not include the ornaments though).
 |
| The original Egg Tree that I made. |
 |
| This year's new and improved Egg Tree. Here are some simple instructions for how to create your own Egg Tree. First you will need the following items: terra cotta pot styrofoam for floral arrangements artificial branches spray paint assorted ribbon Easter grass egg tree ornaments hot glue gun First you will need to cut the styrofoam to fit the pot. Then spray paint the pot using any color you choose. Once the paint is dry use your glue gun to affix the ribbon in desired pattern. Because the pot is not the same size all the way down your ribbon may not lay completely flat and you will need to pull it as tight as possible when gluing. Next put the styrofoam pieces in the pot and push the branches into the foam. I also used a twist tie at the base of the branches to hold them together as they were leaning outward and I didn't want a sprawling tree. Once your branches are arranged to your liking just add your egg tree ornaments and you are done! The great thing about this is that you can make changes and updates from year to year simply by adding a new coat of spray paint in a different color, changing your ribbon trim or adding new ornaments! |
Subscribe to:
Comments (Atom)